Contents
- Basic terminology
- Installation
- The REST API
- Document Operations
- The Mapping API
- The Multi Get API
- The Bulk API
- Searching
- Aggregations
- X-Pack
- Creating Test Data
Basic terminology
- Node is a single server within a cluster. Nodes perform the actual indexing and search work. Each node has a unique id and name.
- Cluster a collection of nodes that work together to achieve a shared goal. Is assigned a unique name, which by default is
elasticsearch. This name is used to join nodes. - Index is a collection of similar (not the same) documents, and is uniquely identified by name. By default every index is given 5 shards and 1 replica.
- Types represents an entity with a similar set of characteristics, and in essence are a way of partitioning documents up. For example book reviews and book comments could each be modelled as types.
- Document is the unit of information to be indexed. Represented as JSON. Every document must have a type and an index it belongs to.
- Shards are the division of an index across nodes. This enables the cluster to parallise the work of index store and retreival operations.
- Replicas clone shards across other nodes one or more times, providing high availability (in the event an individual shard node fails) and increasing search throughput.
Installation
Java
Make sure an Oracle 8 or 10 JVM is available. Elastic 6.4.x interestingly JVM support matrix only supports four JVM’s.
$ java -version
java version "1.8.0_191"
Java(TM) SE Runtime Environment (build 1.8.0_191-b12)
Java HotSpot(TM) 64-Bit Server VM (build 25.191-b12, mixed mode)
Ensure $JAVA_HOME is set.
$ echo $JAVA_HOME
/usr/lib/jvm/java-8-oracle
Distribution
Package (yum or deb)
Best option to get setup with systemd, and nice global /etc/elasticsearch for configuration.
$ sudo dpkg -i elasticsearch-6.5.4.deb
Unpacking elasticsearch (6.5.4) ...
Setting up elasticsearch (6.5.4) ...
Installing new version of config file /etc/elasticsearch/jvm.options ...
Installing new version of config file /etc/elasticsearch/log4j2.properties ...
Installing new version of config file /usr/lib/systemd/system/elasticsearch.service ...
Created elasticsearch keystore in /etc/elasticsearch
The Elasticsearch distribution is placed in /usr/share/elasticsearch/
Enable and start:
sudo systemctl enable elasticsearch
sudo systemctl start elasticsearch
tarball
After downloading and unpacking the tarball distribution of Elasticsearch, spark it up ./bin/elasticsearch.
In its default configuration will spawn a single node cluster named elasticsearch, with a randomly named node. For example, in the logs produced when starting elasticsearch above:
$ ./bin/elasticsearch
[2018-11-11T21:17:07,090][INFO ][o.e.n.Node             ] [] initializing ...
[2018-11-11T21:17:07,175][INFO ][o.e.n.Node             ] [Yi6V9UY] node name derived from node ID [Yi6V9UYfS2KwZDIxQniRdQ]; set [node.name] to override
[2018-11-11T21:17:12,131][DEBUG][o.e.a.ActionModule     ] Using REST wrapper from plugin org.elasticsearch.xpack.security.Security
[2018-11-11T21:17:12,321][INFO ][o.e.d.DiscoveryModule  ] [Yi6V9UY] using discovery type [zen]
[2018-11-11T21:17:12,999][INFO ][o.e.n.Node             ] [Yi6V9UY] initialized
[2018-11-11T21:17:13,000][INFO ][o.e.n.Node             ] [Yi6V9UY] starting ...
[2018-11-11T21:17:13,148][INFO ][o.e.t.TransportService   ] [Yi6V9UY] publish_address {127.0.0.1:9300}, bound_addresses {[::1]:9300}, {127.0.0.1:9300}
[2018-11-11T21:17:16,377][INFO ][o.e.x.s.t.n.SecurityNetty4HttpServerTransport] [Yi6V9UY] publish_address {127.0.0.1:9200}, bound_addresses {[::1]:9200}, {127.0.0.1:9200}
[2018-11-11T21:17:16,389][INFO ][o.e.n.Node             ] [Yi6V9UY] started
To explicitly set cluster and node names, set the cluster.name and node.name properties, for example:
./bin/elasticsearch -Ecluster.name=bencode-search-cluster -Enode.name=bencode-search-node-one
Configuration
Core
Jump into /etc/elasticsearch/elasticsearch.yml. Some key properties to set:
cluster-namenode.namepath.datasuch as/var/lib/elasticsearchpath.logssuch as/var/log/elasticsearchnetwork.hostfor the net bind address (e.g. make this a non-loopback0.0.0.0) for remote accessnetwork.port
Memory
Rule of thumb, the elasticsearch service should be allocated 50% of the available system memory of the host. Memory usage is defined in /etc/elasticsearch/jvm.options.
Tweak the JVM heap size 50% of the host memory (e.g. if the host is running 16GB, set the heap size to 8GB), by updating the -Xms and -Xmx parameters.
Verify
Check that init (systemd) has bootstrapped elastic with a quick ps -eaf | grep elast.
List the log and data directories (both defined in elasticsearch.yml typically /var/log/elasticsearch and /var/lib/elasticsearch) They should contain a number of sub-dirs and files.
Check logs, I set my cluster-name to bencode-es6:
# less /var/log/elasticsearch/bencode-es6.log
...
[2019-01-24T18:00:32,541][INFO ][o.e.t.TransportService   ] [bennode-1] publish_address {127.0.0.1:9300}, bound_addresses {[::1]:9300}, {127.0.0.1:9300}
[2019-01-24T18:00:35,674][INFO ][o.e.c.s.MasterService    ] [bennode-1] zen-disco-elected-as-master ([0] nodes joined), reason: new_master {bennode-1}{db8ZTx3VRnSDXtOfZqfYSQ}{IhzGrx8iSwK_10wx5P9e9w}{127.0.0.1}{127.0.0.1:9300}{ml.machine_memory=4136497152, xpack.installed=true, ml.max_open_jobs=20, ml.enabled=t
...
Can see the node is listening on 9300, and has been elected as the master node.
Firewall
Totally depends on the deployment architecture. For example, it’s a best practice to sit Elasticsearch behind a reverse proxy (i.e. nginx). If for whatever reason you want to expose ES to the wider world directly…
RHEL/Centos 7
$ firewall-cmd --zone=public --permanent --add-port=9200/tcp
$ firewall-cmd --zone=public --permanent --add-port=80/tcp
$ firewall-cmd --reload
The REST API
Elasticsearch operations are entirely represented as a REST API. This may include listing out current nodes or indices, populating indices or searching them.
Some common HTTP verb REST conventions:
- GET is used to query and fetch read-only information
- PUT is for creating and updating resources, and is idempotent.
- POST is strictly used for updating resources only, and it NOT idempotent.
Health
The cluster:
$ curl -XGET '192.168.43.112:9200/_cluster/health?'
{
  "cluster_name" : "bencode-es6",
  "status" : "green",
  "timed_out" : false,
  "number_of_nodes" : 1,
  "number_of_data_nodes" : 1,
  "active_primary_shards" : 0,
  "active_shards" : 0,
  "relocating_shards" : 0,
  "initializing_shards" : 0,
  "unassigned_shards" : 0,
  "delayed_unassigned_shards" : 0,
  "number_of_pending_tasks" : 0,
  "number_of_in_flight_fetch" : 0,
  "task_max_waiting_in_queue_millis" : 0,
  "active_shards_percent_as_number" : 100.0
}
The node:
$ curl -XGET 'localhost:9200/_cat/health'
1541932515 21:35:15 bencode-search-cluster green 1 1 0 0 0 0 0 0 - 100.0%
Statistics
$ curl -XGET '192.168.43.112:9200/_cluster/stats?human&pretty'
{
  "_nodes" : {
    "total" : 1,
    "successful" : 1,
    "failed" : 0
  },
  "cluster_name" : "bencode-es6",
  "cluster_uuid" : "eGQH1-vtSOW6kOB2ilXMcQ",
  "timestamp" : 1548314381166,
  "status" : "green",
  "indices" : {
    "count" : 0,
...
List Indicies
$ curl -XGET 'localhost:9200/_cat/indices?v&pretty'
health status index uuid pri rep docs.count docs.deleted store.size pri.store.size
List Nodes
$ curl -XGET 'localhost:9200/_cat/nodes?v&pretty'
ip      heap.percent ram.percent cpu load_1m load_5m load_15m node.role master name
127.0.0.1         10        94  32  0.38  0.54  0.47 mdi    *   bencode-search-node-one
Document Operations
Create Index
$ curl -XPUT 'localhost:9200/products?&pretty'
Results in:
{
    "acknowledged" : true,
    "shards_acknowledged" : true,
    "index" : "products"
}
This index should now appear in the index listing:
$ curl -XGET 'localhost:9200/_cat/indices?v&pretty'
health status index uuid                pri rep docs.count docs.deleted store.size pri.store.size
yellow open   products eK-kB4Z2R-aoq2ZJz96Yxw   5   1       0         0   1.2kb       1.2kb
Lets create some more.
$ curl -XPUT 'localhost:9200/customers?&pretty'
{
    "acknowledged" : true,
    "shards_acknowledged" : true,
    "index" : "customers"
}

$ curl -XPUT 'localhost:9200/orders?&pretty'
{
    "acknowledged" : true,
    "shards_acknowledged" : true,
    "index" : "orders"
}
Again, listing them.
$ curl -XGET 'localhost:9200/_cat/indices?v&pretty'
health status index   uuid                pri rep docs.count docs.deleted store.size pri.store.size
yellow open   customers 2cXqClWESaaUJnHsWtrNCQ   5   1        0         0   1.1kb       1.1kb
yellow open   orders  v9zIVmpPSuG8CVHmYJQKyw   5   1        0         0     861b        861b
yellow open   products  eK-kB4Z2R-aoq2ZJz96Yxw   5   1        0         0   1.2kb       1.2kb
With Mappings
This particular index is going to hold US vehicle efficiency data from an EPA data set. To avoid ES incorrectly auto identify a type, will explicitly map each field in the document type. Specifc types are well documented.
curl -XPUT 'localhost:9200/cars?pretty' -H 'Content-Type: application/json' -d @cars.settings
The cars.settings file:
{
  "mappings": {
    "car": {
      "properties": {
        "UCity": {
          "type": "text",
          "fields": {
            "keyword": {
              "type": "keyword",
              "ignore_above": 256
            }
          }
        },
        "UHighway": {
          "type": "text",
          "fields": {
            "keyword": {
              "type": "keyword",
              "ignore_above": 256
            }
          }
        },
        "barrels08": {
          "type": "float"
        },
        "age":      { "type": "integer" },
        "created":  {
          "type":   "date",
          "format": "strict_date_optional_time||epoch_millis"
        }
      }
    }
  }
}
The UCity property highlights the use of a multi-field, through the use of the fields parameter.
It is often useful to index the same field in different ways for different purposes. For instance, a string field could be indexed as a text field for full-text search, and as a keyword field for sorting or aggregations. Alternatively, you could index a string field with the standard analyzer, the english analyzer, and the french analyzer. This is the purpose of multi-fields.
Index Naming Conventions
Data based:
/keyboards
/movies
/tweets
Time based:
/2019-01-17-weblogs
/2019-01-18-weblogs
/2019-01-19-weblogs
These make sense when only a certain time chunk of data is kept around, like 14 days of nginx logs for example.
Populating an Index
$ curl -XPUT 'localhost:9200/products/laptops/1?pretty' -H 'Content-Type: application/json' -d'
{
  "name": "Acer Predator Helios 300",
  "price": 1050,
  "processor": "i7-7700HQ",
  "gpu": "1060 6GB",
  "storage": 128,
  "screen-size": 15.6
}'
Result:
{
  "_index" : "products",
  "_type" : "laptops",
  "_id" : "1",
  "_version" : 1,
  "result" : "created",
  "_shards" : {
    "total" : 2,
    "successful" : 1,
    "failed" : 0
  },
  "_seq_no" : 0,
  "_primary_term" : 1
}
Lets load some more laptop documents:
$ curl -XPUT 'localhost:9200/products/laptops/2?pretty' -H 'Content-Type: application/json' -d'
{
  "name": "HP Pavilion 15T",
  "price": 1200,
  "processor": "i7-8750H",
  "gpu": "1060 3GB",
  "storage": 128,
  "screen-size": 15.6
}'
Result:
{
  "_index" : "products",
  "_type" : "laptops",
  "_id" : "2",
  "_version" : 1,
  "result" : "created",
  "_shards" : {
    "total" : 2,
    "successful" : 1,
    "failed" : 0
  },
  "_seq_no" : 0,
  "_primary_term" : 1
}
Of note is the version which is automatically incremented when the document is changed. shards shows how many shards were accessed for the operation. When populating subsequent documents, ensure that the id (products/laptops/1) is unique.
As of 6.X Elasticsearch no longer supports multiple types per index. A better convention is to therefore name the index something that represents the specific document type. For example, an index for mechanical keyboards might be named keyboards, which contains a type of keyboard.
Create the keyboards index:
$ curl -XPUT 'localhost:9200/keyboards?&pretty'
{
  "acknowledged" : true,
  "shards_acknowledged" : true,
  "index" : "keyboards"
}
Load in a document:
$ curl -XPUT 'localhost:9200/keyboards/keyboard/1?pretty' -H 'Content-Type: application/json' -d'
{
  "name": "Ducky One 2 RGB Black",
  "price": 195,
  "switch": "Cherry Red"
}'
Result:
{
  "_index" : "keyboards",
  "_type" : "keyboard",
  "_id" : "1",
  "_version" : 1,
  "result" : "created",
  "_shards" : {
    "total" : 2,
    "successful" : 1,
    "failed" : 0
  },
  "_seq_no" : 0,
  "_primary_term" : 1
}
And another:
$ curl -XPUT 'localhost:9200/keyboards/keyboard/2?pretty' -H 'Content-Type: application/json' -d'
{
  "name": "Das Keyboard 4",
  "price": 239,
  "switch": "Cherry Brown"
}'
Result:
{
  "_index" : "keyboards",
  "_type" : "keyboard",
  "_id" : "2",
  "_version" : 1,
  "result" : "created",
  "_shards" : {
    "total" : 2,
    "successful" : 1,
    "failed" : 0
  },
  "_seq_no" : 0,
  "_primary_term" : 1
}
Auto Document Identifiers
To have ES take care of assigning some unique ID, simply omit the id from the request, and do a POST (instead of a PUT). For example:
$ curl -XPOST 'localhost:9200/keyboards/keyboard/?pretty' -H 'Content-Type: application/json' -d'
{
  "name": "Corsair K70 MK2 RGB",
  "price": 215,
  "switch": "Cherry Brown"
}'
{
  "_index" : "keyboards",
  "_type" : "keyboard",
  "_id" : "eNWXAmcBtICRwxvkuXtb",
  "_version" : 1,
  "result" : "created",
  "_shards" : {
    "total" : 2,
    "successful" : 1,
    "failed" : 0
  },
  "_seq_no" : 0,
  "_primary_term" : 1
}
Listing the indices statistics will show the number of documents each index contains:
$ curl -XGET 'localhost:9200/_cat/indices?v&pretty'
health status index 	uuid               	pri rep docs.count docs.deleted store.size pri.store.size
yellow open   keyboards b4Tw2K4cRZeSdaJmzEisPw   5   1      	3        	0 	13.7kb     	13.7kb
yellow open   customers 2cXqClWESaaUJnHsWtrNCQ   5   1      	0        	0  	1.2kb      	1.2kb
yellow open   orders	v9zIVmpPSuG8CVHmYJQKyw   5   1      	0        	0  	1.2kb      	1.2kb
yellow open   orderss   Re5PpYpSR4mdONPXIJ0Cqw   5   1      	0        	0  	1.2kb      	1.2kb
yellow open   products  eK-kB4Z2R-aoq2ZJz96Yxw   5   1      	3        	0   	17kb       	17kb
Retreiving Documents
Simply throw a GET request with the details:
$ curl -XGET 'localhost:9200/keyboards/keyboard/1?pretty'
{
  "_index" : "keyboards",
  "_type" : "keyboard",
  "_id" : "1",
  "_version" : 1,
  "found" : true,
  "_source" : {
    "name" : "Ducky One 2 RGB Black",
    "price" : 195,
    "switch" : "Cherry Red"
  }
}
If the document ID doesn’t exist:
$ curl -XGET 'localhost:9200/keyboards/keyboard/100?pretty'
{
  "_index" : "keyboards",
  "_type" : "keyboard",
  "_id" : "100",
  "found" : false
}
Hot tip: To avoid pulling back the document content (_source) in the response, and incuring this expense, you can ask ES to leave it out by adding &_source=false to the request.
$ curl -XGET 'localhost:9200/keyboards/keyboard/1?pretty&_source=false'
{
  "_index" : "keyboards",
  "_type" : "keyboard",
  "_id" : "1",
  "_version" : 1,
  "found" : true
}
You can strip out document properties that are not of interest, by specifying the columns you would like to be returned as a comma delimited list, for example &_source=name,comments,model,price.
$ curl -XGET 'localhost:9200/keyboards/keyboard/1?pretty&_source=name'
{
  "_index" : "keyboards",
  "_type" : "keyboard",
  "_id" : "1",
  "_version" : 1,
  "found" : true,
  "_source" : {
    "name" : "Ducky One 2 RGB Black"
  }
}
Existance Checking
Done using the HEAD verb, for example:
$ curl -I -XHEAD 'localhost:9200/keyboards/keyboard/3?pretty'
HTTP/1.1 404 Not Found
content-type: application/json; charset=UTF-8
content-length: 87
Or for a document that does exist:
$ curl -I -XHEAD 'localhost:9200/keyboards/keyboard/2?pretty'
HTTP/1.1 200 OK
content-type: application/json; charset=UTF-8
content-length: 231
Updating Documents
Partial and full updates to documents are supported by Elasticsearch. A document to update:
$ curl -XGET 'localhost:9200/keyboards/keyboard/1?pretty&_source=name'
{
  "_index" : "keyboards",
  "_type" : "keyboard",
  "_id" : "1",
  "_version" : 1,
  "found" : true,
  "_source" : {
    "name" : "Ducky One 2 RGB Black"
  }
}
A full update is done with the ‘PUT’ verb. All properties of the document need to be defined even if the existing value of a property has not changed. If not, the property will be removed from the document in the update.
$ curl -XPUT 'localhost:9200/keyboards/keyboard/2?pretty' -H 'Content-Type: application/json' -d'
{
  "name": "Das Keyboard 4",
  "price": 299,
  "switch": "Cherry Blue"
}'
Results:
{
  "_index" : "keyboards",
  "_type" : "keyboard",
  "_id" : "2",
  "_version" : 2,
  "result" : "updated",
  "_shards" : {
    "total" : 2,
    "successful" : 1,
    "failed" : 0
  },
  "_seq_no" : 1,
  "_primary_term" : 2
}
Partial updates are available via the Update API, which entails using the POST HTTP verb, with a JSON document that has a doc field. Partial updates are nice, because existing changes are retained in the update. For example, to add a new type property to the keyboard document for Das Keyboard 4:
$ curl -XPOST 'localhost:9200/keyboards/keyboard/2/_update?pretty' -H 'Content-Type: application/json' -d'
{
  "doc": {
    "type": "Tenkeyless"
  }
}'
Results:
{
  "_index" : "keyboards",
  "_type" : "keyboard",
  "_id" : "2",
  "_version" : 6,
  "result" : "updated",
  "_shards" : {
    "total" : 2,
    "successful" : 1,
    "failed" : 0
  },
  "_seq_no" : 5,
  "_primary_term" : 2
}
Verify the document:
$ curl -XGET 'localhost:9200/keyboards/keyboard/2?pretty'
{
  "_index" : "keyboards",
  "_type" : "keyboard",
  "_id" : "2",
  "_version" : 6,
  "found" : true,
  "_source" : {
    "name" : "Das Keyboard 4",
    "price" : 299,
    "switch" : "Cherry Blue",
    "type" : "Tenkeyless"
  }
}
The update API is will noop if no actual changes result in the request.
The update API includes scripting support, using the Painless scripting language, and is acheived by sending a script property within the JSON document that is POST’ed. For example:
$ curl -XPOST 'localhost:9200/keyboards/keyboard/2/_update?pretty' -H 'Content-Type: application/json' -d'
{
  "script": "ctx._source.price = ctx._source.price / 2",
  "lang": "painless"
}'
Results:
{
  "_index" : "keyboards",
  "_type" : "keyboard",
  "_id" : "2",
  "_version" : 7,
  "result" : "updated",
  "_shards" : {
    "total" : 2,
    "successful" : 1,
    "failed" : 0
  },
  "_seq_no" : 6,
  "_primary_term" : 2
}
This should have halved the price, a quick check:
$ curl -XGET 'localhost:9200/keyboards/keyboard/2?pretty'
{
  "_index" : "keyboards",
  "_type" : "keyboard",
  "_id" : "2",
  "_version" : 7,
  "found" : true,
  "_source" : {
    "name" : "Das Keyboard 4",
    "price" : 149,
    "switch" : "Cherry Blue",
    "type" : "Tenkeyless"
  }
}
Deleting Documents
$ curl -XDELETE 'localhost:9200/keyboards/keyboard/3?pretty'
Results:
{
  "_index" : "keyboards",
  "_type" : "keyboard",
  "_id" : "3",
  "_version" : 2,
  "result" : "deleted",
  "_shards" : {
    "total" : 2,
    "successful" : 1,
    "failed" : 0
  },
  "_seq_no" : 1,
  "_primary_term" : 3
}
Deleting an Index
Listing out indices in the clusters, find that index orderss is to be deleted:
$ curl -XGET 'localhost:9200/_cat/indices?v&pretty'
health status index 	uuid               	pri rep docs.count docs.deleted store.size pri.store.size
yellow open   keyboards b4Tw2K4cRZeSdaJmzEisPw   5   1      	3        	0 	14.3kb     	14.3kb
yellow open   customers 2cXqClWESaaUJnHsWtrNCQ   5   1      	0        	0  	1.2kb      	1.2kb
yellow open   orders	v9zIVmpPSuG8CVHmYJQKyw   5   1      	0        	0  	1.2kb      	1.2kb
yellow open   orderss   Re5PpYpSR4mdONPXIJ0Cqw   5   1      	0        	0  	1.2kb      	1.2kb
yellow open   products  eK-kB4Z2R-aoq2ZJz96Yxw   5   1      	3        	0   	17kb       	17kb
Similar to deleting a document, use the DELETE verb:
$ curl -XDELETE 'localhost:9200/orderss'
{
  "acknowledged": true
}
Reindexing an Index
Over time you may wish to modify the mapping of an index. The Reindex API makes this possible.
Create a new index, based of an existing index, that has the desired mappings.
Run the reindex API (as below) to hydrate the new index
Alias the new index, with the name of the old index, to prevent breaking consumers.
POST _reindex { “source”: { “index”: “twitter” }, “dest”: { “index”: “new_twitter” } }
Aliasing an Index
APIs in Elasticsearch require an index name. By using Index Aliases its possible to associate an alias name with an index, which will automatically be converted to the real alias name. Some cool features of aliasing:
POST /_aliases
{
    "actions" : [
        { "add" : { "index" : "test1", "alias" : "alias1" } }
    ]
}
- Can map to more than one index.
- Be associated with a filter that will automatically be applied when searching and routing.
For example:
POST /_aliases
{
    "actions" : [
        {
            "add" : {
                 "index" : "test1",
                 "alias" : "alias2",
                 "filter" : { "term" : { "user" : "kimchy" } }
            }
        }
    ]
}
The Mapping API
Defining a document, its fields and specific data types, and the way it should be stored and index is managed by the Mapping API.
Mapping is the process of defining how a document, and the fields it contains, are stored and indexed. Use mappings to define which string fields should be treated as full text fields, which fields contain numbers/dates/geolocations, the format of date values or custom rules to control the mapping for dynamically added fields.
The Multi Get API
Amoung the various document API’s available the Multi Get API allows for retrieval of multiple documents based on an index, type (optional) and id (optional). The response includes a docs array with all the fetched documents.
$ curl -XGET 'localhost:9200/_mget?pretty' -H 'Content-Type: application/json' -d'
{
  "docs": [
  {
    "_index": "keyboards",
    "_type": "keyboard",
    "_id": "1"
  },
  {
    "_index": "keyboards",
    "_type": "keyboard",
    "_id": "2"
  }
  ]
}'
Results:
{
  "docs" : [
  {
    "_index" : "keyboards",
    "_type" : "keyboard",
    "_id" : "1",
    "_version" : 1,
    "found" : true,
    "_source" : {
      "name" : "Ducky One 2 RGB Black",
      "price" : 195,
      "switch" : "Cherry Red"
    }
  },
  {
    "_index" : "keyboards",
    "_type" : "keyboard",
    "_id" : "2",
    "_version" : 7,
    "found" : true,
    "_source" : {
      "name" : "Das Keyboard 4",
      "price" : 149,
      "switch" : "Cherry Blue",
      "type" : "Tenkeyless"
    }
  }
  ]
}
The Bulk API
The bulk API makes it possible to perform many index/delete operations in a single API call. This can greatly increase the indexing speed.
The possible actions are index, create, delete and update. For the create, index and update actions its assumed a document follows after a line feed (\n). For example, to index a new keyboard document as id 4:
curl -XPOST 'localhost:9200/_bulk?pretty' -H 'Content-Type: application/json' -d'
{ "index" : { "_index": "keyboards", "_type": "keyboard", "_id": "4" } }
{ "name": "Cooler Master MK750 RGB", "price": 189, "switch": "Cherry Blue", "type": "Full" }
'
Results:
{
  "took" : 9,
  "errors" : false,
  "items" : [
    {
      "index" : {
        "_index" : "keyboards",
        "_type" : "keyboard",
        "_id" : "4",
        "_version" : 1,
        "result" : "created",
        "_shards" : {
            "total" : 2,
            "successful" : 1,
            "failed" : 0
        },
        "_seq_no" : 7,
        "_primary_term" : 3,
        "status" : 201
      }
    }
  ]
}
A more realistic example would involve many operations packed together, for example:
curl -X POST "localhost:9200/_bulk" -H 'Content-Type: application/json' -d'
{ "index" : { "_index" : "keyboards", "_type" : "keyboard", "_id" : "1" } }
{ "field1" : "value1" }
{ "delete" : { "_index" : "keyboards", "_type" : "keyboard", "_id" : "2" } }
{ "create" : { "_index" : "keyboards", "_type" : "keyboard", "_id" : "3" } }
{ "field1" : "value3" }
{ "update" : {"_id" : "1", "_type" : "keyboard", "_index" : "keyboards"} }
{ "doc" : {"field2" : "value2"} }
'
Bulk Loading from JSON File
Feed in a bulk file with curl using the --data-binary switch (to preserve newlines).
keyboards.json
{ "index": {} }
{ "name": "Razer BlackWidow Chroma V2", "switch": "Razer Orange", "price": 120, "type": "Full" }
{ "index": {} }
{ "name": "Mad Catz S.T.R.I.K.E. TE", "switch": "Kailh Brown", "price": 190, "type": "Full" }
{ "index": {} }
{ "name": "SteelSeries 6Gv2", "switch": "Cherry MX Black", "price": 280, "type": "Full" }
{ "index": {} }
{ "name": "Logitech G710+", "switch": "Cherry MX Blue", "price": 89, "type": "Full" }
POST them to Elasticsearch with curl:
$ curl -XPOST 'localhost:9200/keyboards/keyboard/_bulk?pretty' -H 'Content-Type: application/json' --data-binary @"keyboards.json"
Results:
{
  "took" : 32,
  "errors" : false,
  "items" : [
    {
      "index" : {
        "_index" : "keyboards",
        "_type" : "keyboard",
        "_id" : "EkamDGcBjeEQi7qr6n_Y",
        "_version" : 1,
        "result" : "created",
        "_shards" : {
          "total" : 2,
          "successful" : 1,
          "failed" : 0
        },
        "_seq_no" : 8,
        "_primary_term" : 3,
        "status" : 201
      }
    },
    {
      "index" : {
        "_index" : "keyboards",
        "_type" : "keyboard",
        "_id" : "E0amDGcBjeEQi7qr6n_Y",
        "_version" : 1,
        "result" : "created",
        "_shards" : {
          "total" : 2,
          "successful" : 1,
          "failed" : 0
        },
        "_seq_no" : 0,
        "_primary_term" : 3,
        "status" : 201
      }
    },
    {
      "index" : {
        "_index" : "keyboards",
        "_type" : "keyboard",
        "_id" : "FEamDGcBjeEQi7qr6n_Y",
        "_version" : 1,
        "result" : "created",
        "_shards" : {
          "total" : 2,
          "successful" : 1,
          "failed" : 0
        },
        "_seq_no" : 9,
        "_primary_term" : 3,
        "status" : 201
      }
    },
    {
      "index" : {
        "_index" : "keyboards",
        "_type" : "keyboard",
        "_id" : "FUamDGcBjeEQi7qr6n_Y",
        "_version" : 1,
        "result" : "created",
        "_shards" : {
          "total" : 2,
          "successful" : 1,
          "failed" : 0
        },
        "_seq_no" : 10,
        "_primary_term" : 3,
        "status" : 201
      }
    }
  ]
}
Searching
Background
The TF/IDF Algorithm
The Term Frequency / Inverse Document Frequency (TF/IDF), is a numeric statistic that reflects how important a word is to a document, and breaks down like this:
- Term frequency is how often the term appear in the field of interest (e.g.
greatin the review field) - Inverse document frequency is how often the term is used across all the documents, the idea is to water down irrelevant words such as if, a, then, this and so on.
- Field length norm the length of the field itself to guage importance (e.g. words in a book title are more important that the words in the book content)
The Query DSL
Elasticsearch provides a full Query DSL (Domain Specific Language) based on JSON to define queries.
Query Context
A query clause used in query context answers the question “How well does this document match this query clause?”. Besides deciding whether or not the document matches, the query clause also calculates a _score representing how well the document matches, relative to other documents.
Query context is in effect whenever a query clause is passed to a query parameter, such as the query parameter in the search API.
Filter Context
In filter context, a query clause answers the question “Does this document match this query clause?”. The answer is a simple Yes or No. No scores are calculated. Filter context is mostly used for filtering structured data, e.g.
- Does this timestamp fall into the range 2015 to 2016?
- Is the status field set to “published”?
An example of query clauses used in query and filter context in the search API:
GET /_search
{
  "query": {
    "bool": {
      "must": [
        { "match": { "title":   "Search"        }},
        { "match": { "content": "Elasticsearch" }}
      ],
      "filter": [
        { "term":  { "status": "published" }},
        { "range": { "publish_date": { "gte": "2015-01-01" }}}
      ]
    }
  }
}
Another filter context example with range:
curl -XGET 'localhost:9200/people/_search?pretty' -H 'Content-Type: application/json' -d'
{
  "query": {
    "bool": {
      "must": { "match_all": {} },
      "filter": {
        "range": {
          "age": {
            "gte": 20,
            "lte": 30
          }
        }
      }
    }
  }
}'
Stateful vs Stateless
Elasticsearch is stateless for search queries (i.e. no session or cursor). This means no paginated results.
Searching Multiple Indices
Searches both the people and programmers indices:
$ curl -XGET 'localhost:9200/people,programmers/_search?q=dennis&pretty'
Searching with Query String Params
First, searching using query string params, via the Search API. There are dozens of supported parameters available from sort to explain. First up the essential q (query) param:
$ curl -XGET 'localhost:9200/people/_search?q=dennis&pretty'
Results:
{
  "took" : 144,
  "timed_out" : false,
  "_shards" : {
    "total" : 5,
    "successful" : 5,
    "skipped" : 0,
    "failed" : 0
  },
  "hits" : {
    "total" : 1,
    "max_score" : 4.97903,
    "hits" : [
      {
        "_index" : "people",
        "_type" : "person",
        "_id" : "MM-6EWcBCquaYatLNLOg",
        "_score" : 4.97903,
        "_source" : {
          "name" : "Henrietta Dennis",
          "age" : 53,
          "gender" : "female",
          "company" : "TYPHONICA",
          "email" : "henriettadennis@typhonica.com",
          "phone" : "+1 (811) 498-2016",
          "street" : "778 Bond Street",
          "city" : "Tolu",
          "state" : "Missouri, 4768"
        }
      }
    ]
  }
}
By default a maximum of 10 results are returned.
The sort param takes an attribute and optional order. Sorting invalidates any result scoring.
$ curl -XGET 'localhost:9200/people/_search?q=dennis&sort=age:asc&pretty'
The size param controls the number of results returned:
$ curl -XGET 'localhost:9200/people/_search?q=state:california&from=42&pretty'
The from param defines the starting index of hits to returnL
$ curl -XGET 'localhost:9200/people/_search?q=state:california&from=12&size=2&pretty'
Search Multiple Indexes
By comma separating the index names:
curl -XGET 'localhost:9200/carsforsale,cars/_search?q=make:ford&pretty'
Searching using the Request Body
Articulating search criteria can be done via the JSON request body. The request body method exposes more functionality than what it possible with query params:
curl -XGET 'localhost:9200/people/_search?pretty' -H 'Content-Type: application/json' -d'
{
  "query": { "match_all": {} },
  "from": 20,
  "size": 10,
  "sort": { "age": { "order": "desc" } }
}'
Term Search
Traverses the inverted index for an exact term match (e.g. state = ’nsw’).
curl -XGET 'localhost:9200/people/_search?pretty' -H 'Content-Type: application/json' -d'
{
  "query": {
    "term": { "name": "gates" }
  },
  "_source": false
}'
Also instructs ES not to drag back actual _source documents that are hit, resulting in a much leaner response footprint. The _source supports wildcard (glob) filtering. To only return document properties that begin with a:
curl -XGET 'localhost:9200/people/_search?pretty' -H 'Content-Type: application/json' -d'
{
  "query": {
    "term": { "state": "nsw" }
  },
  "_source": [ "a*", "*st" ]
}'
More granular inclusion and exclusion rules can be defined:
curl -XGET 'localhost:9200/people/_search?pretty' -H 'Content-Type: application/json' -d'
{
  "query": {
    "term": { "state": "nsw" }
  },
  "_source": {
    "includes": [ "a*", "*st" ],
    "excludes": [ "*desc*" ]
  }
}'
Full Text Search
Unlike the term search, full text search need not be exact matches. match queries accept text/numerics/dates, analyses them, and constructs a boolean query.
curl -XGET 'localhost:9200/people/_search?pretty' -H 'Content-Type: application/json' -d'
{
  "query": {
    "match": {
      "name": "jones" }
  }
}'
Phases, their words and the individual relationships between them can be defined with the operator keyword (default is OR):
curl -XGET 'localhost:9200/people/_search?pretty' -H 'Content-Type: application/json' -d'
{
  "query": {
    "match": {
      "name": {
        "query": "george jones",
        "operator": "or"
      }
    }
  }
}'
The above or will return hits on the name property that contain either the word george or jones.
The match_phrase query analyses the query text and creates a phrase query out of the result. The analyzer keyword allow a specific analyser to be used. Useful when an exact phrase match (i.e. a sequence of multiple words) is needed.
curl -XGET 'localhost:9200/people/_search?pretty' -H 'Content-Type: application/json' -d'
{
  "query": {
    "match_phrase": {
      "street": "pleasant place"
    }
  }
}'
The match_phrase_prefix is the same as match_phrase, except that it allows for prefix matches on the last term in the text.
curl -XGET 'localhost:9200/people/_search?pretty' -H 'Content-Type: application/json' -d'
{
  "query": {
    "match_phrase_prefix": {
      "street": "pleasant pl"
    }
  }
}'
Boolean Compound Queries
The Query DSL supports a variety of compound queries, a query that matches on combinations of other queries. The Bool Query is one such compound query available.
mustclause must appearshouldclause mostly appears, but may not sometimesmust_notfilterclause is to always appear in the results, but just not scored
For example, two (full text) match queries compounded together.
curl -XGET 'localhost:9200/people/_search?pretty' -H 'Content-Type: application/json' -d'
{
  "query": {
    "bool": {
      "must": [
        { "match": { "street": "miami" } },
        { "match": { "street": "court" } }
      ]
    }
  }
}'
Again, but this time with term queries:
curl -XGET 'localhost:9200/people/_search?pretty' -H 'Content-Type: application/json' -d'
{
  "query": {
    "bool": {
      "should": [
        {
          "term": {
            "age": {
              "value": 21,
              "boost": 2.0
            }
          }
        },
        {
          "term": {
            "age": {
              "value": 28
            }
          }
        }
      ]
    }
  }
}'
The boost param allows a particular (sub) query to elevate the importance by boosting the score by a multiplier. In the above, 21 year olds are twice as important in the query.
Aggregations
Changing gears, its time to showcase one of ES analytical features, aggregations. In a nutshell, you can summarise data based on a search query (awesome!). Types of aggreations include:
- Bucketing documents are washed against each bucket, and if it satisfies the criteria “falls in” (think GROUP BY in SQL)
- Metric track and compute numeric statistics across documents
- Matrix operate on multiple fields and produce a matrix result (no scripting support)
- Pipeline daisy chain other aggregations
A hugely powerful feature is the ability to nest aggregations. Given a bucket essentially defines a document set, aggregations can also be applied at the bucket level.
Metric Aggregations
Deals with numeric aggregations such as sum, count, avg, min and max. Example that averages the age of all people documents:
curl -XPOST 'localhost:9200/people/_search?pretty' -H 'Content-Type: application/json' -d'
{
  "size": 0,
  "aggregations": {
    "avg_age": {
      "avg": {
        "field": "age"
      }
    }
  }
}'
Results in 52.526:
{
  "took" : 77,
  "timed_out" : false,
  "_shards" : {
    "total" : 5,
    "successful" : 5,
    "skipped" : 0,
    "failed" : 0
  },
  "hits" : {
    "total" : 1000,
    "max_score" : 0.0,
    "hits" : [ ]
  },
  "aggregations" : {
    "avg_age" : {
      "value" : 52.526
    }
  }
}
Note the size param instructs that a sampling of documents are to come back into the response.
Aggregations support compound queries, for example the following boolean compound search figures are the average age of people within the state of Victoria.
curl -XPOST 'localhost:9200/people/_search?pretty' -H 'Content-Type: application/json' -d'
{
  "size": 0,
  "query": {
    "bool": {
      "filter": {
        "match": { "state": "victoria" }
      }
    }
  },
  "aggregations": {
    "avg_age": {
      "avg": {
        "field": "age"
      }
    }
  }
}'
The nifty stats aggregation will produce a multi-value result, that includes all the bread and butter stats. Example:
curl -XPOST 'localhost:9200/people/_search?pretty' -H 'Content-Type: application/json' -d'
{
  "size": 0,
  "aggregations": {
    "stats_age": {
      "stats": {
        "field": "age"
      }
    }
  }
}'
You’ll get these back in return:
"aggregations" : {
  "stats_age" : {
    "count" : 1000,
    "min" : 20.0,
    "max" : 85.0,
    "avg" : 52.526,
    "sum" : 52526.0
  }
}
Cardinality Aggregation
Next up a cardinality aggregation calculates a count of distinct values.
curl -XPOST 'localhost:9200/people/_search?pretty' -H 'Content-Type: application/json' -d'
{
  "size": 0,
  "aggregations": {
    "distinct_ages": {
      "cardinality": {
        "field": "age"
      }
    }
  }
}'
FieldData with The Mapping API
Results in 66 unique age values. Metric aggregations (like cardinality) by default only work with numeric fields. This is because ES hashes text data into the inverted index (saving on space and comparison operations). The original text data is stored in fielddata, an on demand in-memory data structure. To apply a cardinality aggregation to say the gender field, can instruct ES to work with the original field value of gender against fielddata. Enabling fielddata is done using the Mapping API.
curl -XPUT 'localhost:9200/people/_mapping/person?pretty' -H 'Content-Type: application/json' -d'
{
  "properties": {
    "gender": {
      "type": "text",
      "fielddata": true
    }
  }
}'
If successful, will get an "acknowledged" : true. The field can now be used within aggregations, for example:
curl -XPOST 'localhost:9200/people/_search?pretty' -H 'Content-Type: application/json' -d'
{
  "size": 0,
  "aggregations": {
    "distinct_genders": {
      "cardinality": {
        "field": "gender"
      }
    }
  }
}'
Results in 2 unique genders:
{
  "aggregations" : {
    "distinct_genders" : {
      "value" : 2
    }
  }
}
Bucketing Aggregations
Bucket aggregations, as opposed to metrics aggregations, can hold sub-aggregations. These sub-aggregations will be aggregated for the buckets created by their parent bucket aggregation.
curl -XPOST 'localhost:9200/people/_search?pretty' -H 'Content-Type: application/json' -d'
{
  "size": 0,
  "aggregations": {
    "gender_bucket": {
      "terms": {
        "field": "gender"
      }
    }
  }
}'
Will split genders into buckets, results in:
{
  "aggregations" : {
    "gender_bucket" : {
      "doc_count_error_upper_bound" : 0,
      "sum_other_doc_count" : 0,
      "buckets" : [
        {
          "key" : "male",
          "doc_count" : 518
        },
        {
          "key" : "female",
          "doc_count" : 482
        }
      ]
    }
  }
}
More granular control over buckets can be achieved using ranges:
curl -XPOST 'localhost:9200/people/_search?pretty' -H 'Content-Type: application/json' -d'
{
  "size": 0,
  "aggregations": {
    "age_ranges": {
      "range": {
        "field": "age",
        "ranges": [
          { "to": 30 },
          { "from": 30, "to": 40 },
          { "from": 40, "to": 55 },
          { "from": 55 }
        ]
      }
    }
  }
}'
Results in:
{
  "aggregations" : {
    "age_ranges" : {
      "buckets" : [
        {
          "key" : "*-30.0",
          "to" : 30.0,
          "doc_count" : 164
        },
        {
          "key" : "30.0-40.0",
          "from" : 30.0,
          "to" : 40.0,
          "doc_count" : 144
        },
        {
          "key" : "40.0-55.0",
          "from" : 40.0,
          "to" : 55.0,
          "doc_count" : 217
        },
        {
          "key" : "55.0-*",
          "from" : 55.0,
          "doc_count" : 475
        }
      ]
    }
  }
}
Alternatively buckets can be tagged with more meaningful names, by specifying the key property like so:
curl -XPOST 'localhost:9200/people/_search?pretty' -H 'Content-Type: application/json' -d'
{
  "size": 0,
  "aggregations": {
    "age_ranges": {
      "range": {
        "field": "age",
        "keyed": true,
        "ranges": [
          { "key": "young", "to": 30 },
          { "key": "denial years", "from": 30, "to": 40 },
          { "key": "midlife crisis", "from": 40, "to": 55 },
          { "key": "old", "from": 55 }
        ]
      }
    }
  }
}'
Nested Aggregations
Finally, we can witness the power. For example, the average age between genders:
curl -XPOST 'localhost:9200/people/_search?pretty' -H 'Content-Type: application/json' -d'
{
  "size": 0,
  "aggregations": {
    "gender_bucket": {
      "terms": {
        "field": "gender"
      },
      "aggregations": {
        "average_age": {
          "avg": {
            "field": "age"
          }
        }
      }
    }
  }
}'
Results in:
{
  "aggregations" : {
    "gender_bucket" : {
      "doc_count_error_upper_bound" : 0,
      "sum_other_doc_count" : 0,
      "buckets" : [
        {
          "key" : "male",
          "doc_count" : 518,
          "average_age" : {
            "value" : 53.61003861003861
          }
        },
        {
          "key" : "female",
          "doc_count" : 482,
          "average_age" : {
            "value" : 51.36099585062241
          }
        }
      ]
    }
  }
}
There is no limit on nesting levels. For example, the following 3 layer aggregration groups by gender and age range, and then takes the average.
Filter Aggregation
Aggregrations, like queries, support filters. No suprise here.
curl -XPOST 'localhost:9200/people/_search?pretty' -H 'Content-Type: application/json' -d'
{
  "size": 0,
  "aggregations": {
    "texans_only": {
      "filter": { "term": { "state": "texas" } },
      "aggregations": {
        "average_age": {
          "avg" : {
            "field": "age"
          }
        }
      }
    }
  }
}'
Results:
{
  "aggregations" : {
    "texans_only" : {
      "doc_count" : 17,
      "average_age" : {
        "value" : 52.470588235294116
      }
    }
  }
}
If needed, multiple filters can be specified:
curl -XPOST 'localhost:9200/people/_search?pretty' -H 'Content-Type: application/json' -d'
{
  "size": 0,
  "aggregations": {
    "state_filter": {
      "filters": {
        "filters": {
          "florida": { "match": { "state": "florida" } },
          "oregon": { "match": { "state": "oregon" } },
          "colorado": { "match": { "state": "colorado" } }
        }
      },
      "aggregations": {
        "average_age": {
          "avg" : {
            "field": "age"
          }
        }
      }
    }
  }
}'
X-Pack
Security
Kerberos with Active Directory
My lab setup involves a Windows 2016 domain controller (i.e. the KDC or Key Distribution Center) called dodgy-dc.bencode.net and a CentOS 7 box running both Kibana and Elasticsearch called heaphy.bencode.net. The CentOS box was previously configured and joined to the domain, see [SSO with Active Directory]({% post_url 2019-01-04-directory-services %}).
krb5.conf
Kerberos configuration. My domain is BENCODE.NET and the Windows Domain Controller (KDC) is dodgy-dc.bencode.net. It’s worth highlighting that DNS on the Elasticsearch Linux box is bound to the Windows DC by setting the nameserver in /etc/resolv.conf.
includedir /etc/krb5.conf.d/

[logging]
 default = FILE:/var/log/krb5libs.log
 kdc = FILE:/var/log/krb5kdc.log
 admin_server = FILE:/var/log/kadmind.log

[libdefaults]
 dns_lookup_realm = true
 dns_lookup_kdc = true
 ticket_lifetime = 24h
 renew_lifetime = 7d
 forwardable = true
 rdns = false
 default_realm = BENCODE.NET
 default_tkt_enctypes = arcfour-hmac
 #default_keytab_name = FILE:/etc/krb5.keytab
 #default_tgs_enctypes = arcfour-hmac-md5 des-cbc-crc des-cbc-md5
 #default_tks_enctypes = arcfour-hmac-md5 des-cbc-crc des-cbc-md5

[realms]
BENCODE.NET = {
  kdc = dodgy-dc.bencode.net
  admin_server = dodgy-dc.bencode.net
}

[domain_realm]
 .bencode.net = BENCODE.NET
 bencode.net = BENCODE.NET
Kerberos Principals (keytab fun)
In a Kerberos realm every user or service that interacts with the KDC needs to authenticate. This applies to each Elasticsearch node in the cluster that wishes to validate user session tickets.
There’s not much concrete information out there about doing this on a Windows 2016 KDC, as a result for me this was the most painful part of the Kerberos setup. After trying to tame ktpass.exe for hours, this discussion thread on discuss.elastic.co was a godsend.
msktutil
Msktutil creates user or computer accounts in Active Directory, creates Kerberos keytabs on Unix/Linux systems, adds and removes principals to and from keytabs and changes the user or computer account’s password.
Install it from a package:
$ sudo yum install msktutil
Initiate a kerberos session with a domain administrator:
# kinit administrator
Password for administrator@BENCODE.NET:
This session should be active, check with klist:
# klist
Ticket cache: FILE:/tmp/krb5cc_0
Default principal: administrator@BENCODE.NET

Valid starting       Expires              Service principal
02/18/2019 14:25:24  02/19/2019 00:25:24  krbtgt/BENCODE.NET@BENCODE.NET
	renew until 02/25/2019 14:25:19
Create the principal and keytab:
# msktutil --create --use-service-account --keytab heaphy-elastic.keytab --account-name elastic-service --dont-expire-password -b "OU=Service Accounts" --password "password" --description "Elastic Service account" --server dodgy-dc.bencode.net --verbose
 -- execute: Using password from command line
 -- create_fake_krb5_conf: Created a fake krb5.conf file: /tmp/.msktkrb5.conf-xXwbiV
 -- destroy_g_context: Destroying Kerberos Context
 -- initialize_g_context: Creating Kerberos Context
 -- finalize_exec: SAM Account Name is: elastic-service
 -- try_machine_keytab_princ: Trying to authenticate for elastic-service from local keytab
 -- try_machine_keytab_princ: Error: krb5_get_init_creds_keytab failed (Key table entry not found)
 -- try_machine_keytab_princ: Authentication with keytab failed
 -- try_machine_keytab_princ: Trying to authenticate for ELASTIC-SERVICE from local keytab
 -- try_machine_keytab_princ: Error: krb5_get_init_creds_keytab failed (Key table entry not found)
 -- try_machine_keytab_princ: Authentication with keytab failed
 -- try_machine_keytab_princ: Trying to authenticate for host/heaphy.bencode.net from local keytab
 -- try_machine_keytab_princ: Error: krb5_get_init_creds_keytab failed (Key table entry not found)
 -- try_machine_keytab_princ: Authentication with keytab failed
 -- try_machine_password: Trying to authenticate for elastic-service with password
 -- create_default_machine_password: Default machine password for elastic-service is elastic-servic
 -- try_machine_password: Error: krb5_get_init_creds_keytab failed (Client not found in Kerberos database)
 -- try_machine_password: Authentication with password failed
 -- try_user_creds: Checking if default ticket cache has tickets
 -- finalize_exec: Authenticated using method 5
 -- LDAPConnection: Connecting to LDAP server: dodgy-dc.bencode.net
SASL/GSSAPI authentication started
SASL username: administrator@BENCODE.NET
SASL SSF: 256
SASL data security layer installed.
 -- ldap_get_base_dn: Determining default LDAP base: dc=BENCODE,dc=NET
 -- ldap_check_account: Checking that a service account for elastic-service exists
 -- ldap_create_account: Service account not found, create the account
No service account for elastic-service found, creating a new one.
 -- ldap_check_account_strings: Inspecting (and updating) service account attributes
 -- ldap_set_userAccountControl_flag: Setting userAccountControl bit at 0x200000 to 0x0
 -- ldap_set_userAccountControl_flag: userAccountControl not changed 0x200
 -- ldap_set_userAccountControl_flag: Setting userAccountControl bit at 0x10000 to 0x1
 -- ldap_get_kvno: KVNO is 1
 -- remove_keytab_entries: Trying to remove entries for elastic-service from keytab
 -- execute: Updating all entries for service account elastic-service in the keytab WRFILE:heaphy-elastic.keytab
 -- update_keytab: Updating all entries for elastic-service
 -- add_principal_keytab: Adding principal to keytab: elastic-service
 -- get_salt: Using salt of BENCODE.NETelastic-service
 -- add_principal_keytab:   Adding entry of enctype 0x17
 -- add_principal_keytab:   Adding entry of enctype 0x11
 -- add_principal_keytab:   Adding entry of enctype 0x12
 -- add_keytab_entries: Trying to add missing entries for elastic-service to keytab
Add (HTTP) SPN to the principal:
# msktutil update -s HTTP/heaphy.bencode.net --use-service-account --account-name elastic-service --keytab heaphy-elastic.keytab --dont-change-password -b "OU=Service Accounts" --server dodgy-dc.bencode.net --verbose --user-creds-only
 -- execute: Skipping creation of new password
 -- create_fake_krb5_conf: Created a fake krb5.conf file: /tmp/.msktkrb5.conf-fU9CZY
 -- destroy_g_context: Destroying Kerberos Context
 -- initialize_g_context: Creating Kerberos Context
 -- finalize_exec: SAM Account Name is: elastic-service
 -- try_user_creds: Checking if default ticket cache has tickets
 -- finalize_exec: Authenticated using method 5
 -- LDAPConnection: Connecting to LDAP server: dodgy-dc.bencode.net
SASL/GSSAPI authentication started
SASL username: administrator@BENCODE.NET
SASL SSF: 256
SASL data security layer installed.
 -- ldap_get_base_dn: Determining default LDAP base: dc=BENCODE,dc=NET
 -- ldap_check_account: Checking that a service account for elastic-service exists
 -- ldap_check_account: Checking service account - found
 -- ldap_check_account: Found userAccountControl = 0x10200
 -- ldap_check_account: Found supportedEncryptionTypes = 28
 -- ldap_check_account_strings: Inspecting (and updating) service account attributes
 -- ldap_set_supportedEncryptionTypes: No need to change msDs-supportedEncryptionTypes they are 28
 -- ldap_set_userAccountControl_flag: Setting userAccountControl bit at 0x200000 to 0x0
 -- ldap_set_userAccountControl_flag: userAccountControl not changed 0x10200
 -- ldap_get_kvno: KVNO is 1
 -- ldap_add_principal: Checking that adding principal HTTP/heaphy.bencode.net to elastic-service won't cause a conflict
 -- ldap_add_principal: Adding principal HTTP/heaphy.bencode.net to LDAP entry
 -- remove_keytab_entries: Trying to remove entries for elastic-service from keytab
 -- execute: Updating all entries for service account elastic-service in the keytab WRFILE:heaphy-elastic.keytab
 -- update_keytab: Updating all entries for elastic-service
 -- add_principal_keytab: Adding principal to keytab: elastic-service
 -- get_salt: Using salt of BENCODE.NETelastic-service
 -- add_principal_keytab: No password available, skipping creation of password based keytab ntries
 -- add_principal_keytab: Adding principal to keytab: HTTP/heaphy.bencode.net
 -- get_salt: Using salt of BENCODE.NETelastic-service
 -- add_principal_keytab: No password available, skipping creation of password based keytab ntries
 -- add_keytab_entries: Trying to add missing entries for elastic-service to keytab
 -- add_keytab_entries: Checking if HTTP/heaphy.bencode.net needs to be added to keytab
 -- add_keytab_entries: Adding HTTP/heaphy.bencode.net@BENCODE.NET (kvno=1, enctype=23) to keytab
 -- add_keytab_entries: Adding HTTP/heaphy.bencode.net@BENCODE.NET (kvno=1, enctype=17) to keytab
 -- add_keytab_entries: Adding HTTP/heaphy.bencode.net@BENCODE.NET (kvno=1, enctype=18) to keytab
The resulting keytab:
# klist -ek /etc/elasticsearch/heaphy-elastic.keytab
Keytab name: FILE:/etc/elasticsearch/heaphy-elastic.keytab
KVNO Principal
---- --------------------------------------------------------------------------
   2 HTTP/heaphy.bencode.net@BENCODE.NET (aes256-cts-hmac-sha1-96)
   1 elastic-service@BENCODE.NET (arcfour-hmac)
   1 elastic-service@BENCODE.NET (aes128-cts-hmac-sha1-96)
   1 elastic-service@BENCODE.NET (aes256-cts-hmac-sha1-96)
   1 HTTP/heaphy.bencode.net@BENCODE.NET (arcfour-hmac)
   1 HTTP/heaphy.bencode.net@BENCODE.NET (aes128-cts-hmac-sha1-96)
   1 HTTP/heaphy.bencode.net@BENCODE.NET (aes256-cts-hmac-sha1-96)
   1 HTTP/heaphy.bencode.net:9200@BENCODE.NET (arcfour-hmac)
   1 HTTP/heaphy.bencode.net:9200@BENCODE.NET (aes128-cts-hmac-sha1-96)
   1 HTTP/heaphy.bencode.net:9200@BENCODE.NET (aes256-cts-hmac-sha1-96)
The resulting user object created in the realm:
PS C:\Users\Administrator> Get-ADUser elastic-service -Properties *
AccountExpirationDate            	:
accountExpires                   	: 9223372036854775807
AccountLockoutTime               	:
AccountNotDelegated              	: False
AllowReversiblePasswordEncryption	: False
AuthenticationPolicy             	: {}
AuthenticationPolicySilo         	: {}
BadLogonCount                    	: 0
badPasswordTime                  	: 0
badPwdCount                      	: 0
CannotChangePassword             	: False
CanonicalName                    	: bencode.net/Service Accounts/elastic-service
Certificates                     	: {}
City                             	:
CN                               	: elastic-service
codePage                         	: 0
Company                          	:
CompoundIdentitySupported        	: {False}
Country                          	:
countryCode                      	: 0
Created                          	: 2/17/2019 8:16:21 PM
createTimeStamp                  	: 2/17/2019 8:16:21 PM
Deleted                          	:
Department                       	:
Description                      	: Elastic Service account
DisplayName                      	:
DistinguishedName                	: CN=elastic-service,OU=Service Accounts,DC=bencode,DC=net
Division                         	:
DoesNotRequirePreAuth            	: False
dSCorePropagationData            	: {12/31/1600 4:00:00 PM}
EmailAddress                     	:
EmployeeID                       	:
EmployeeNumber                   	:
Enabled                          	: True
Fax                              	:
GivenName                        	:
HomeDirectory                    	:
HomedirRequired                  	: False
HomeDrive                        	:
HomePage                         	:
HomePhone                        	:
Initials                         	:
instanceType                     	: 4
isDeleted                        	:
KerberosEncryptionType           	: {RC4, AES128, AES256}
LastBadPasswordAttempt           	:
LastKnownParent                  	:
lastLogoff                       	: 0
lastLogon                        	: 131949371497407444
LastLogonDate                    	: 2/17/2019 8:19:09 PM
lastLogonTimestamp               	: 131949371497407444
LockedOut                        	: False
logonCount                       	: 1
LogonWorkstations                	:
Manager                          	:
MemberOf                         	: {}
MNSLogonAccount                  	: False
MobilePhone                      	:
Modified                         	: 6/2/2019 9:03:54 PM
modifyTimeStamp                  	: 6/2/2019 9:03:54 PM
msDS-SupportedEncryptionTypes    	: 28
msDS-User-Account-Control-Computed   : 0
Name                             	: elastic-service
nTSecurityDescriptor             	: System.DirectoryServices.ActiveDirectorySecurity
ObjectCategory                   	: CN=Person,CN=Schema,CN=Configuration,DC=bencode,DC=net
ObjectClass                      	: user
ObjectGUID                       	: cf6e4033-3609-48ca-99af-b9d7df3441cb
objectSid                        	: S-1-5-21-1898737560-3652999267-1274238646-1119
Office                           	:
OfficePhone                      	:
Organization                     	:
OtherName                        	:
PasswordExpired                  	: False
PasswordLastSet                  	: 2/17/2019 8:16:21 PM
PasswordNeverExpires             	: True
PasswordNotRequired              	: False
POBox                            	:
PostalCode                       	:
PrimaryGroup                     	: CN=Domain Users,CN=Users,DC=bencode,DC=net
primaryGroupID                   	: 513
PrincipalsAllowedToDelegateToAccount : {}
ProfilePath                      	:
ProtectedFromAccidentalDeletion  	: False
pwdLastSet                       	: 131949369817040948
SamAccountName                   	: elastic-service
sAMAccountType                   	: 805306368
ScriptPath                       	:
sDRightsEffective                	: 15
servicePrincipalName             	: {HTTP/heaphy.bencode.net:9200, HTTP/heaphy.bencode.net}
ServicePrincipalNames            	: {HTTP/heaphy.bencode.net:9200, HTTP/heaphy.bencode.net}
SID                              	: S-1-5-21-1898737560-3652999267-1274238646-1119
SIDHistory                       	: {}
SmartcardLogonRequired           	: False
State                            	:
StreetAddress                    	:
Surname                          	:
Title                            	:
TrustedForDelegation             	: True
TrustedToAuthForDelegation       	: False
UseDESKeyOnly                    	: False
userAccountControl               	: 590336
userCertificate                  	: {}
UserPrincipalName                	:
uSNChanged                       	: 45094
uSNCreated                       	: 36960
whenChanged                      	: 6/2/2019 9:03:54 PM
whenCreated                      	: 6/2/2019 9:03:54 PM
ktpass
Using the Active Directory Users and Computers snap-in, create a new user object to represent the service account. I called mine service-elastic
setspn -A HTTP/heaphy.bencode.net@BENCODE.NET service-elastic
setspn -L HEAPHY
ktpass /princ HTTP/heaphy.bencode.net@BENCODE.NET /out http-heaphy.keytab /crypto all /ptype KRB5_NT_PRINCIPAL -desonly /mapuser BENCODE\HEAPHY$ /pass \*
note: I was never fully successful using ktpass, although with some more perseverance believe this should be doable.
Elasticsearch Configuration
Enable X-Pack security, and setup the realm chain by tweaking /etc/elasticsearch/elasticsearch.yml:
xpack.security.enabled: true

xpack.security.authc:
  realms:
    kerb1:
      type: kerberos
      order: 0
      enabled: true
      keytab.path: heaphy-elastic.keytab
      remove_realm_name: false
      krb.debug: true
Restart the elasticsearch daemon.
$ sudo systemctl restart elasticsearch
X-Pack Setup Users
Before getting kerberos running, in order to still be able to access Kibana and Elasticsearch we need to generate some service account credentials to allow the various pieces of the Elastic stack to continue talking, now that xpack authentication is enabled. The elasticsearch-setup-passwords utility ships out of the box to do this:
# cd /usr/share/elasticsearch/
# ./elasticsearch-setup-passwords auto
Initiating the setup of passwords for reserved users elastic,apm_system,kibana,logstash_system,beats_system,    remote_monitoring_user.
The passwords will be randomly generated and printed to the console.
Please confirm that you would like to continue [y/N]y

Changed password for user apm_system
PASSWORD apm_system = msLhqYolgcBJvf34E1qy

Changed password for user kibana
PASSWORD kibana = IVcJ5IoioqIPCY59nzqs

Changed password for user logstash_system
PASSWORD logstash_system = m0t2UxJrpuoJvB76mGoC

Changed password for user beats_system
PASSWORD beats_system = U6pLuwZFuCqunIDfmfWl

Changed password for user remote_monitoring_user
PASSWORD remote_monitoring_user = keCRiQqE1nB2URKIDlBc

Changed password for user elastic
PASSWORD elastic = Iq16aqhJTmqrwh6MhJmc
Kibana Configuration
Now that X-Pack security is enable, Kibana will no longer be able to integrate with Elasticsearch. Using the credentials generated above, update /etc/kibana/kibana.yml the existing commented lines:
elasticsearch.username: "kibana"
elasticsearch.password: "IVcJ5IoioqIPCY59nzqs"
Restart the kibana daemon.
$ sudo systemctl restart kibana
Kibana no longer will allow anonymous access, and will prompt for credentials.
If you feel that having the credentials in kibana.yml is a bit dirty, alternatively, these credentials can be written to a keystore file, using the kibana-keystore tool.
Create Users
Login to kibana using the built-in elastic account (credentials generated above). You’ll now see that security management features are visible under management. Also the xpack security related API’s are now available. Map the kerberos principal carmack@bencode.net to the monitoring_user role, using Kibana’s console (or curl it if you prefer):
POST _xpack/security/role_mapping/kerbrolemapping
{
  "roles" : [ "monitoring_user" ],
  "enabled": true,
  "rules" : {
    "field" : { "username" : "carmack@BENCODE.NET" }
  }
}
Test It
I spun up a Windows 7 domain connected machine, running IE11, and tried accessing the elasticsearch http://heaphy.bencode.net:9200/. IE will challenge as a result of the SPNEGO tango:
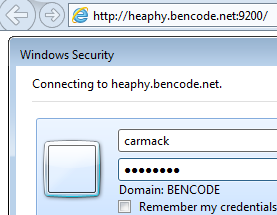
IE11 should be delivered the infamous You Know, for Search JSON document. Unfortunately its not smart enough to render it. If this happens, congratulations you have just successfully kerberised Elasticsearch against the Windows Active Directory KDC.
Another way to shake things down from the Linux side, is to establish a kerberos session, and curl with the negotiate switch like so:
Using a user account carmack, create a new session:
$ kinit carmack@BENCODE.NET
Password for carmack@BENCODE.NET:
And attempt to interact with the kerberised Elasticsearch:
# curl --negotiate -u : -XGET http://heaphy.bencode.net:9200/
{"error":{"root_cause":[{"type":"security_exception","reason":"action [cluster:monitor/main] is unauthorized     for user [carmack@BENCODE.NET]"}],"type":"security_exception","reason":"action [cluster:monitor/main] is     unauthorized for user [carmack@BENCODE.NET]"},"status":403}[root@heaphy elasticsearch]# curl --negotiate -u :     -XGET http://heaphy.bencode.net:9200/
{
  "name" : "fat-elastic-node-1",
  "cluster_name" : "fat-elastic",
  "cluster_uuid" : "Y03G37LBTOSh0Y23wBrjPg",
  "version" : {
    "number" : "6.6.0",
    "build_flavor" : "default",
    "build_type" : "rpm",
    "build_hash" : "a9861f4",
    "build_date" : "2019-01-24T11:27:09.439740Z",
    "build_snapshot" : false,
    "lucene_version" : "7.6.0",
    "minimum_wire_compatibility_version" : "5.6.0",
    "minimum_index_compatibility_version" : "5.0.0"
  },
  "tagline" : "You Know, for Search"
}
If you attempt to access an operation that is not permitted, or a role hasn’t been mapped using the role mapping API, an HTTP 403 will come back with:
{
  "error":{
    "root_cause":[
      {
        "type":"security_exception",
        "reason":"action [cluster:monitor/main] is unauthorized for user [carmack@BENCODE.NET]"
      }
    ],
    "type":"security_exception",
    "reason":"action [cluster:monitor/main] is unauthorized for user [carmack@BENCODE.NET]"
  },
  "status":403
}
Troubleshooting
gss context negotiation failure
A sign that SPN (service principals) have not been setup correctly. Recommend checking out notes above on msktutil. Another tip, never access kerberos services by IP, always use their service principal name (e.g. http://elastic.bencode.net never http://192.168.56.102).
Authentication of [] was terminated by realm [kerb1] - failed to authenticate user, gss context negotiation failure
Useful discussion here discuss.elastic.co.
Some things to try and/or check:
mskutiloverktpass.exe- Enabling delegation on the user
- Verify the
servicePrincipalNamesattribute of the user, should include the SPN of the elastic service being configured
Defective token detected
Defective token detected (Mechanism level: GSSHeader did not find the right tag)
Wireshark HTTP/SPNEGO response:
{
  "error":{
    "root_cause":[
      {
        "type":"security_exception",
        "reason":"Defective token detected (Mechanism level:     GSSHeader did not find the right tag)",
        "header":{
          "WWW-Authenticate":[
            "Negotiate",
            "Basic realm=\"security\"     charset=\"UTF-8\""
          ]
        }
      }
    ],
    "type":"security_exception",
    "reason":"Defective token detected (Mechanism level:     GSSHeader did not find the right tag)",
    "caused_by":{
      "type":"g_s_s_exception",
      "reason":"Defective token     detected (Mechanism level: GSSHeader did not find the right tag)"
    },
    "header":{
      "WWW-Authenticate":[
        "Negotiate",
        "Basic realm=\"security\" charset=\"UTF-8\""
      ]
    }
  }
}
Kerberos clock skew
Failure unspecified at GSS-API level (Mechanism level: Clock skew too great (37))
Wireshark HTTP/SPNEGO response:
{
  "error":{
    "root_cause":[
      {
        "type":"security_exception",
        "reason":"Failure unspecified at GSS-API level (Mechanism level: Clock skew too great (37))",
        "header":{
          "WWW-Authenticate":[
            "Negotiate",
            "Basic realm=\"security\" charset=\"UTF-8\""
          ]
        }
      }
    ],
    "type":"security_exception",
    "reason":"Failure unspecified at GSS-API level (Mechanism level: Clock skew too great (37))",
    "caused_by":{
      "type":"g_s_s_exception",
      "reason":"Failure unspecified at GSS-API level (Mechanism level: Clock skew too great (37))",
      "caused_by":{
        "type":"krb_ap_err_exception",
        "reason":"Clock skew too great (37)"
      }
    },
    "header":{
      "WWW-Authenticate":[
        "Negotiate",
        "Basic realm=\"security\" charset=\"UTF-8\""
      ]
    }
  },
  "status":401
}
Got hit by this suprisingly a few times. Setup NTP against the Windows DC. I have notes on this in my [SSO with Active Directory]({% post_url 2019-01-04-directory-services %}) post.
# ntpdate -u dodgy-dc.bencode.net
Logon name already exists in the enterprise
Seems I screwed my AD. When attempting to set the logon name (UPN) of the user object, AD barfed with:
The specified user logon name already exists in the enterprise. Specify a new one, either by changing the prefix or selecting a different suffix from the list.
To find the conflicted object that has taken the UPN, run an LDAP search using the Active Directory Administrative Center, set the Convert to LDAP option, and set the query to (userPrincipalName=HTTP/heaphy*).
Creating Test Data
Checkout JSON Generator which provides a number of random data generation functions such as surname() and street(). Ensure the data is formatted appropriately for POST’ing to ES using curl by:
- ensuring there is only one record per line
- including a
{ 'index': {} }bulk API directive before each record, on its own line
For example:
{ "index": {} }
[{"name":"Kelly Page","age":34,"gender":"female","company":"MAGNEATO","email":"kellypage@magneato.com","phone":"+1 (881) 422-3362","street":"933 Ingraham Street","city":"Lafferty","state":"Northern Mariana Islands, 5269"}]
{ "index": {} }
[{"name":"Karina Kennedy","age":42,"gender":"female","company":"URBANSHEE","email":"karinakennedy@urbanshee.com","phone":"+1 (911) 506-2780","street":"240 Lee Avenue","city":"Condon","state":"Ohio, 9719"}]
Stream the file to the Elasticsearch bulk API with curl:
$ curl -XPOST 'localhost:9200/people/person/_bulk?pretty' -H 'Content-Type: application/json' --data-binary @"people.json"